For several years now, there have been some individuals online who have shared their experience and discovery of how to make use of a very special and somewhat secretive HDMI port located within their Tesla. Alas, the port is a normal part of the configuration, but not a part with which Tesla owners were ever really intended to use or manipulate.
The HDMI port in question is part of the rear-view camera feed, and some have found that with quite minimal additional kit, one is able to tap into this feed and take advantage of it for entertainment purposes. It should be stressed before we explain this in more detail that these modifications are absolutely NOT recommended by Tesla, nor should their potential fruits ever be enjoyed by drivers while operating the Tesla vehicle in question.
OK, warnings aside, let’s explore what exactly these creative port-explorers have been looking at.
Where is the HDMI Feed in the Tesla?
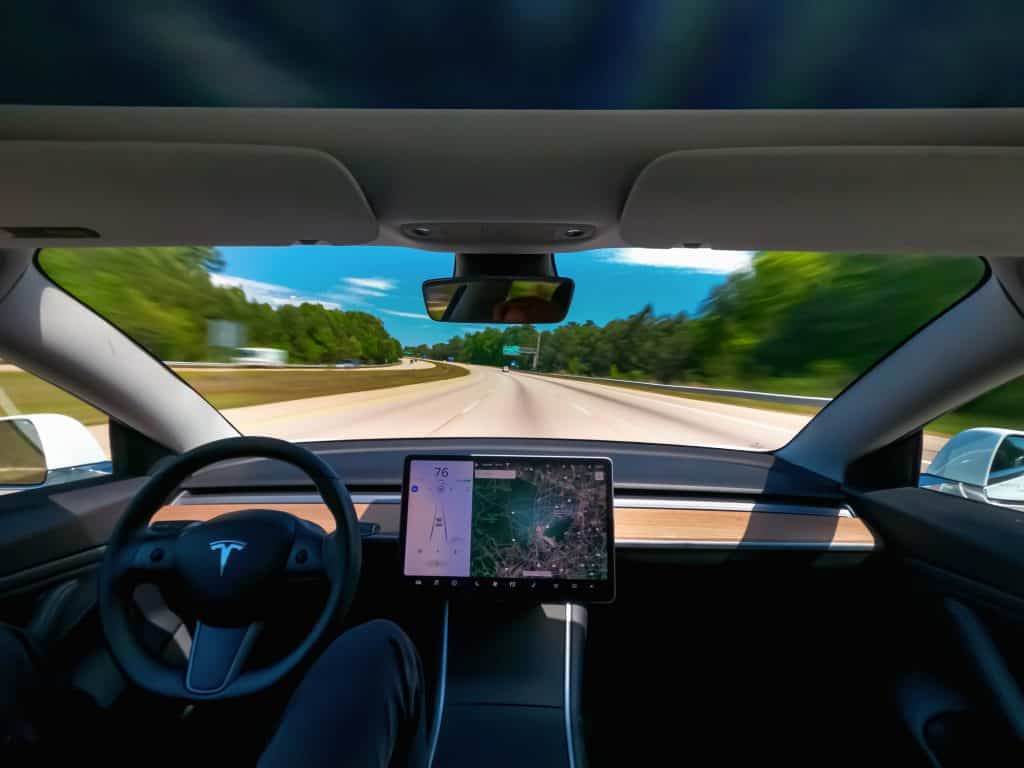
As we mentioned in the introduction, the HDMI feed in question is part of the rear-view camera setup that normally displays on your main Tesla infotainment screen. The following information has been tried previously on the Tesla Model S and X variants, and efforts are ongoing to figure out how to make it work on the Model 3 and Model Y.
Getting to the HDMI port when you have all the right additional gear (see below) is a little bit tricky, but do-able if you know the sequence of panels to remove. One YouTuber deftly demonstrates in his video how to access the port and get started with installing your HDMI interface:
You need to start on the passenger side by dismantling most of the dashboard around the glove box.
Once you’re inside and past the non-screw clipped-on parts, you have to remove 6 screws from around the globe box. Use a T-20 to remove the screws after which you can gently remove the glove box. Be especially careful with the connecting wires to the glove box (for the light); carefully remove them and set the glove box aside.
Now you should be able to see where the camera feed connector is. It should currently have a black cable connected to it (from the rear-view camera feed), and it should be the second port from the near side. Carefully remove that from the port, and never resort to too much force. Ease it out patiently. It has a clip on the top and is round. It should stand out from the blue connector to its left.
The connector you’ve just removed is responsible for feeding the camera feed to your screen. Therefore, the thinking of these Tesla tinkerers is that if you plug another device into that same feed cable, then it will display whatever it’s connected to — smartphone, tablet or other device — on the main infotainment screen.
Hooking Up the Equipment
Next you have to connect up the relevant gear. The above video shows that the main tool needed is the “HDMI Interface Box.” You can buy these online, along with a Bluetooth transmitter, which you will need to get sound if you’re connecting a games console to the system — yes, you can do that!
Along with the interface box, you need an HDMI adapter for your smartphone or tablet, if that’s what you’re connecting. This will allow your device to be connected via HDMI, but also will charge your device at the same time.
The interface box connects to your OBD-II port, which is located right under the dashboard on the driver’s side. It’s a little awkward at first if you’ve never connected anything there before, but you’ll quickly get used to it. Once connected to the OBD-II port, turn on the interface and listen for a clicking sound. A clicking sound — a bit like an oven gas lighter — will indicate that the device is connected to a power source and ready to go.
Connecting the HDMI
So, we already revealed how to get at the camera feed. First, take the now-removed black camera cable and plug it into the blue/turquoise port on your HDMI interface box. Then, you take the green connector and cable on the interface box and plug it into where the black camera feed was.
The interface box has additional red/yellow/orange cables that are intended to use for other types of camera setups, such as the 360-degree camera setup, but for now we’ll stick with the regular camera-cable setup.
You can then connect your device that you want to mirror to the screen via the HDMI port on the interface box. It will display on your screen and you can enjoy media and streaming and more without having to worry about paying Tesla’s “premium connectivity” fees or other things. The other useful thing about this approach is that you are not — despite appearances — sacrificing your rear-view camera.
Remember when we said to plug in the camera cable to the turquoise port on the interface box? The reason for that was so when you put your car into reverse, the back-up camera feed will still instantly show up as you’d expect it to on your Tesla infotainment screen.
Connecting More Devices
So that’s the basic approach people have taken, but others have shown that you can go even further. As some enthusiastic German YouTubers showed us, you can use the HDMI setup also using the same camera feed to plug in your Playstation, and it also works for XBox:
Safety/Legality
We mentioned in the introduction that the HDMI setup wasn’t meant to be used in this way and it’s true. You could be risking your Tesla warranty if you were to inadvertently damage the Tesla system or hardware in any way while making these adjustments.
You could even make a silly mistake like breaking the clips from the dashboard and glove box pieces as you’re removing them one by one from the dashboard.
The other issue is legality, of course, since it’s absolutely illegal and prohibited to be playing video games or watching Netflix as the driver of the car, even if you have Tesla’s so-called “full self-driving,” which is still only SAE level 2 in the world of autonomous vehicles. One added safety issue, of course, is that you are playing with cables and wires in the cars, which means electrics are at play. This is always something you have to approach with extreme caution.
Conclusion: Is it All Worth It?
So, in the end, is it really worth putting this HDMI setup into your Tesla Model S or Model X? If you can handle the dismantling of the glove box and find a way to neaten the cables and store them more tidily to keep the setup in place, there’s no reason not to try if you avoid making mistakes during installation, and if you’re determined that you won’t use it irresponsibly.
One big advantage of this setup is that if you are parked for a long time waiting on someone, or stuck parked on the road because of a big accident up ahead that has traffic stationary and backed up for hours while they clean up, then you have some entertainment in the car at least. What’s more, you can get it while bypassing Tesla’s new monetized approach to on-board entertainment via its “premium connectivity” package.
Hooking up a games console may seem like overkill, and the question of where to put the console box itself remains a tricky issue — it seems from YouTube people like to balance it between the driver and front passenger seats. If it provides an avenue of on-board entertainment that can help pass the time while you are stationary and waiting for something, then more power to you.
Perhaps the same people will find yet another hidden port to take advantage of in the next few years!